 11851
11851
Purchasing a home security camera is undeniably the right step in keeping your home secured. But it doesn’t end in purchasing. You have to get it properly installed and ready to perform its functions. You may be looking to get a technician to get your security camera installed—while that is encouraged, you can also get it done on your own. In this era of DIY, you can save some money by doing some things yourself.
So if you’re ready to install a security camera, we’ve highlighted the basic tips below to help you.
Basic Tips to Install a Home Security Camera
Plan
Unlike trying other things for the first time and it does not matter much whether it’s done right or not, that’s not the case with a security camera. Of course, you should know the reason for getting a security camera is to safeguard your home. So you want to make sure the installation process is done right in the first instance. Therefore, you need to plan, put everything in order, and get all accessories and tools for your installation ready before you begin.
Also, read the installation manual carefully. You don’t want to find out that your camera is not viewing properly, or not correctly placed after the installation. So, take your time to study the camera and read through the installation guide thoroughly before you begin.
Map out All Entry Points
Again, the essence of getting a security camera is for security and nothing else. They are not meant to beautify your home even though they add to the aesthetics. So you want to make sure you cover all entry points in your home. It’s likely that one camera cannot cover all entry points in your home, depending on the design of your home. Therefore, you should get more cameras to cover all entry points.
Do not attempt to use one camera to cover multiple entry points; some areas might not be visible enough. Figure this out, and know the number of cameras you need to cover all entry points. Make sure no entry point is without coverage.
Consider the Power Effect
Did you purchase a battery-powered camera or one that depends on power? If you have a battery-powered camera, you can place it anywhere fit without a wall socket. Otherwise, you should place your camera close to a wall socket for connection to power. You should take note of this before you commence installation so that you don’t end up drilling holes in the wrong place.
How to Install Security Cameras
Now that you’re done with the preparatory stage, it’s time to get started with the installation. Let’s get to it:
Choose a Position
The first thing you want to do is to map out the position to mount the camera. Make sure the camera is placed in a position to cover all entries and exits, and it should be placed above 10ft. Read down to learn about the best places to place security cameras.
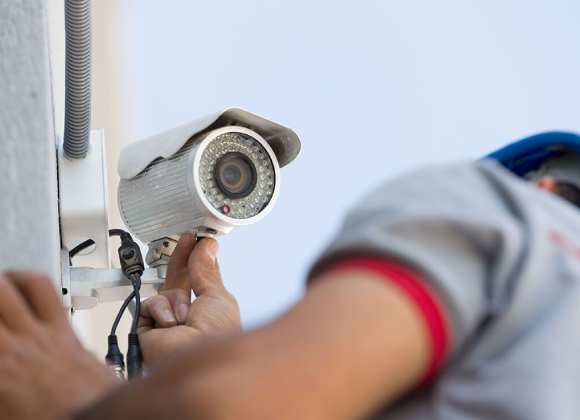
Mount to the Wall
Now, you’re all set to stick your camera to the wall. Some cameras come with sticky pads to attach them to the wall, but you should opt for screws for durability. Your camera should come with screws, use the appropriate screwdriver to screw it to the wall after drilling a hole for a screw with an electric drill. Position the camera to your desired angle after tightening the screws.
Plug to a Power Source
Except you’re using a battery-powered security camera, the next thing to do after successfully mounting your camera is to plug it into a power source. Most cameras come with a power adapter to plug into a wall socket, which makes the process easy for you. You may want to contact the manufacturer if the adapter is missing or purchase a separate adapter—either way.
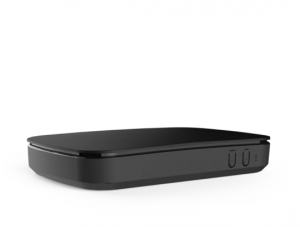
Connect to your DVR
This is for wired cameras. Connect to surveillance equipment using a BNC (Bayonet Neill–Concelman) connection. You can do this by plugging the BNC cables into the right port, turning the small nut on the end to lock it, then plugging one end into your camera’s output, and the other end into the DVR input ports. Make sure your cable has a BNC connection; otherwise, you have to buy one.
Connect to your Computer
This is for wireless cameras—they come with a software disc, and you have to install them to enable you to view your feeds. After installation, follow the instructions on the screen to access your cameras. If your camera has an IP address, you can view your camera remotely by typing the IP into any web browser.
Connect Your Monitor to the DV
For this connection, you need a BNC cable, though HDMI or coaxial cables can be used to connect to DVR as well. After getting the appropriate cable, choose your preferred connection, and connect to the DVR’s output and input port. That is one end to the output and the other to the input.
Troubleshoot for any Connection Issue
Connecting to the DVR should be the final stage. However, you need to check if there are any connection issues. So, check the camera DVR and monitor to see they are properly connected to a power supply and turned on. Also, ensure your cables are attached securely and the rights inputs selected for your DVR and monitor. You can find out if all these are properly done through troubleshooting. If you record any issue, go ahead and fix it; otherwise, your installation is complete.
Note: Different cameras may have slightly different settings. You have to follow the instructions in the manual to aid your installation.
Where to Place Security Cameras
Ideally, your cameras should be placed where they can cover your entryways clearly. The back door, front door, and first-floor windows are the best entry points to place your camera. And these places are the most common entry points for criminals. According to reports, about 81 percent of burglars break in through the first floor. So you want to put your cameras in these positions to ensure adequate coverage.
And when placing your cameras in these areas, you should:
Place them Up High
Your cameras should be placed on an elevated area for broader coverage and also prevent vandalism by thieves. If your camera is placed down there, a thief might destroy it before he commences operation. So you want to make sure your cameras are safe to give you the security you need and also cover more extensive areas.
Place Cameras Under Shelter
To reduce the impact of rainfall on the quality of security footage, place your camera where it’s not directly affected by rain. If left in the open, the rain can affect the lenses and hence poor quality footage.
Do Not Point in the Direction of Light
Avoid mounting the camera to point directly to a source of light. The lens should be pointed away from sources of light to avoid poor vision.
Do Not Expose Cables
You should conceal your camera cables to prevent disconnection by invaders. Install them on places like the side of the buildings, soffits, or ceilings where the cables can be concealed.
Wrap Up
While some people may be able to follow these steps to get their home security camera installed, others may find it difficult. So if the process looks so tough for you to follow, you may want to get an expert to help you. It’s worth it because the security of your home is quite essential.
Related Resources: